Posted by RV Solutions on 22nd Jan 2026
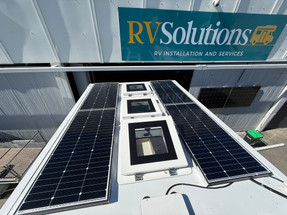
Everything you need to know about designing, sizing and installing a solar power system for your motorhome or caravan in New Zealand.
Solar power has transformed freedom camping in New Zealand, letting motorhome and caravan owners explore remote spots without worrying about power. This guide covers everything from system design to installation, to help you make informed decisions about your RV solar setup.
A properly designed solar system brings several key benefits:
NZ's variable weather makes sizing critical. Winter solar generation can be 50–70% less than summer, and our long, narrow country means different regions get different sun hours. A system designed for summer in Northland may struggle in winter in Otago.
Solar panels are the visible face of your system, mounted on the roof to capture sunlight and convert it to electrical energy. Modern panels are remarkably efficient and durable.
| Panel Type | Efficiency | Best For | Cost |
|---|---|---|---|
| Monocrystalline | 18–24% | Limited roof space, maximum power | $$$ — best performance/watt |
| Polycrystalline | 15–17% | Budget-conscious, larger roof area | $$ — good value |
| Flexible Panels | 15–18% | Curved roofs, lightweight needs | $$$ — convenience premium |
Monocrystalline panels are the gold standard for motorhomes — more efficient, so more power from less roof space, and better in low light and high temperatures common in NZ.
Flexible panels look sleek and install easily, but typically have shorter lifespans (5–10 years vs 20–25 for rigid) and can overheat when mounted flush, reducing output.
Always mount rigid panels with at least 20mm clearance underneath for airflow. This prevents overheating and can increase output by 10–15%. Use proper brackets — never glue panels directly to your roof.
The charge controller is the brain of your system, regulating power from panels to batteries and preventing overcharging or damage.
For NZ conditions, MPPT controllers are strongly recommended — the efficiency gains pay for the cost difference within a year or two, and they extract maximum power during shorter winter days.
Your battery bank stores the energy your panels collect for when the sun isn't shining — often the most expensive component, and one that deserves careful thought.
| Battery Type | Lifespan | Usable Capacity | Weight (100Ah) | Cost |
|---|---|---|---|---|
| AGM | 3–5 years | 50% (use only half) | 28–32 kg | $$ — lower upfront |
| Lithium (LiFePO4) | 10–15 years | 90–100% | 12–14 kg | $$$$ — higher upfront, lower lifetime cost |
AGM batteries are proven, widely available and cheaper upfront — but you can only safely use about 50% of their capacity. A 200Ah AGM bank gives roughly 100Ah of usable power.
Lithium batteries cost more upfront but offer compelling advantages:
Not all lithium batteries are equal. Ensure yours has a quality BMS with low-temperature charging cutoff — lithium can be permanently damaged if charged below 0°C. Critical for NZ, where morning temperatures can drop below freezing.
An inverter converts your 12V DC battery power to 230V AC, letting you run standard household appliances. See our detailed technical guide to RV inverters for more.
Proper sizing is critical — too small and you'll constantly run low; too large and you've wasted money on capacity you'll never use.
List every device you'll use and estimate daily consumption:
| Appliance | Power Draw | Hours/Day | Daily Use |
|---|---|---|---|
| 12V compressor fridge | 45W (average) | 24 hours | 90Ah (cycling) |
| LED lights (4×) | 24W total | 4 hours | 8Ah |
| Water pump | 36W | 0.5 hours | 1.5Ah |
| Laptop (via inverter) | 60W (72W with losses) | 3 hours | 18Ah |
| Phone charging (2×) | 10W | 2 hours | 1.7Ah |
| Total daily consumption | ~120Ah |
For 12V systems: (Watts ÷ 12V) × Hours Used = Amp-hours (Ah)
For 230V through an inverter: add 15–20% to account for inverter losses.
Your bank should provide at least 2–3 days of power without solar input (for cloudy weather):
Your panels need to replenish daily use plus charge losses (typically 20–30%):
Recommended for NZ: size for winter if you plan year-round use, or accept you'll need to supplement charging (driving, generator, mains) through winter.
Daily consumption: 120Ah · Battery bank: 300Ah lithium (or 600Ah AGM) · Solar array: 400–600W (year-round) · Charge controller: 30–40A MPPT · Inverter: 2000W pure sine wave.
This provides reliable off-grid power year-round in most NZ locations with typical usage.
Solar installation involves working on RV roofs, higher voltages and permanent electrical modifications. If you're not confident, professional installation is strongly recommended — incorrect work can cause fire, shock or damage to your RV's electrical system.
Low charging current: check for shading, verify connections are tight and corrosion-free, confirm the controller matches your battery type, and test panel output with a multimeter.
Batteries not holding charge: AGM sulfates if left discharged (may be permanently damaged); check for parasitic loads when parked; verify the controller reaches full charge voltage; and remember capacity naturally decreases with age.
ROI: if you freedom camp 100 nights a year instead of using powered sites ($30–50/night), a $6,000 system pays for itself in 2–4 years, then provides free power for its 20+ year lifespan.
RV Solutions in Christchurch provides professional solar system design and installation. We'll calculate your power needs, recommend the right components, and install everything to the highest standards.
A well-designed solar system transforms motorhome and caravan travel, providing reliable off-grid power and genuine freedom to explore NZ's landscapes. The upfront investment is significant, but the long-term benefits — financial and lifestyle — make solar one of the best upgrades you can make.
The key to success is proper sizing based on realistic consumption. Oversizing slightly gives margin for cloudy days and future additions; undersizing leads to constant compromise and battery damage. For NZ we recommend monocrystalline panels, MPPT controllers, lithium batteries if budget allows, 400–600W minimum for year-round full-time use, and professional installation for safety and performance.
This article is general guidance to help you plan, not specific electrical advice for your vehicle. Real-world sizing depends on your exact loads, location and components — always have solar and 230V work designed and installed by a qualified professional.